Check step by step procedure to convert OST to PST Outlook and other file types.
Step 1: At first Download and Run OST to PST Converter in your system. After that, go to the "Browse" option to open the OST file.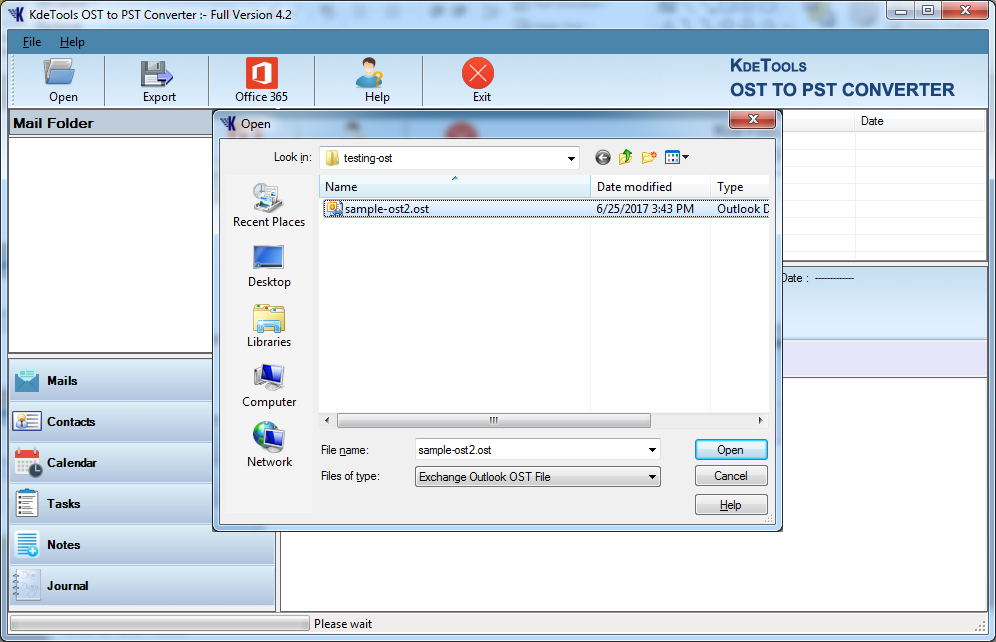
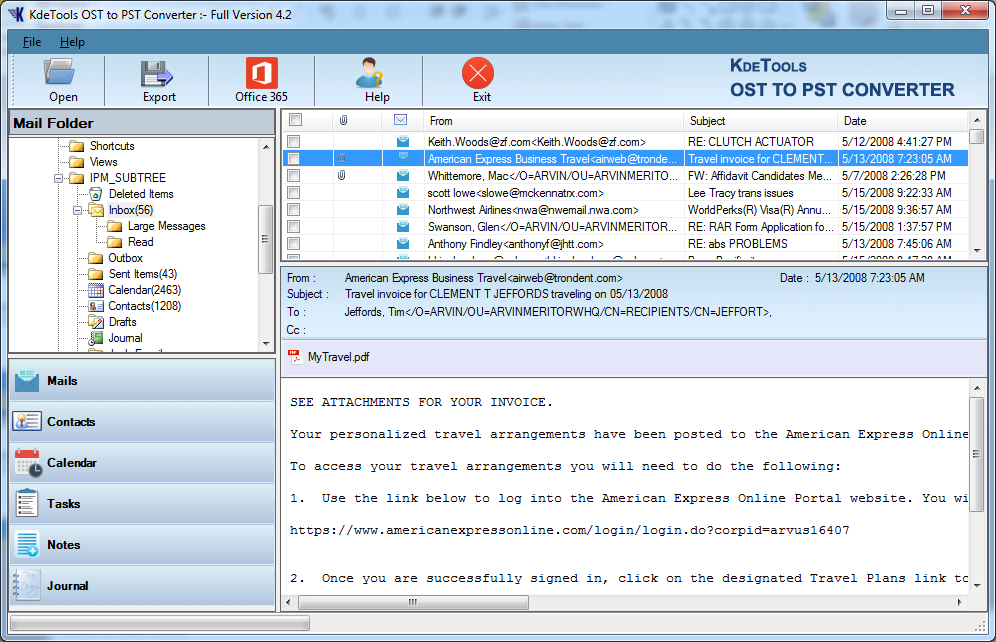
Step 2: After opening the OST data, check the OST file preview in the right side of the software.
Step 3: Press on the "Export" button from Navigation to choose the saving option. And dialog box will appear on your screen.
Choose the required saving extension e.g. PST, MBOX, EML, EMLX and save file.
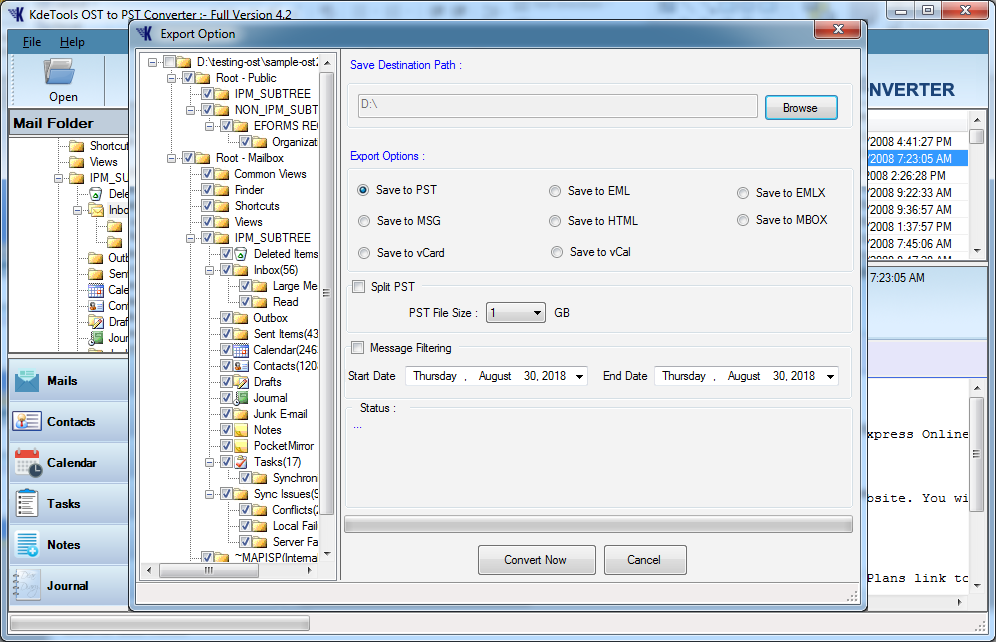
Step 4: Go to “Splitting” option to split the large OST files by size.
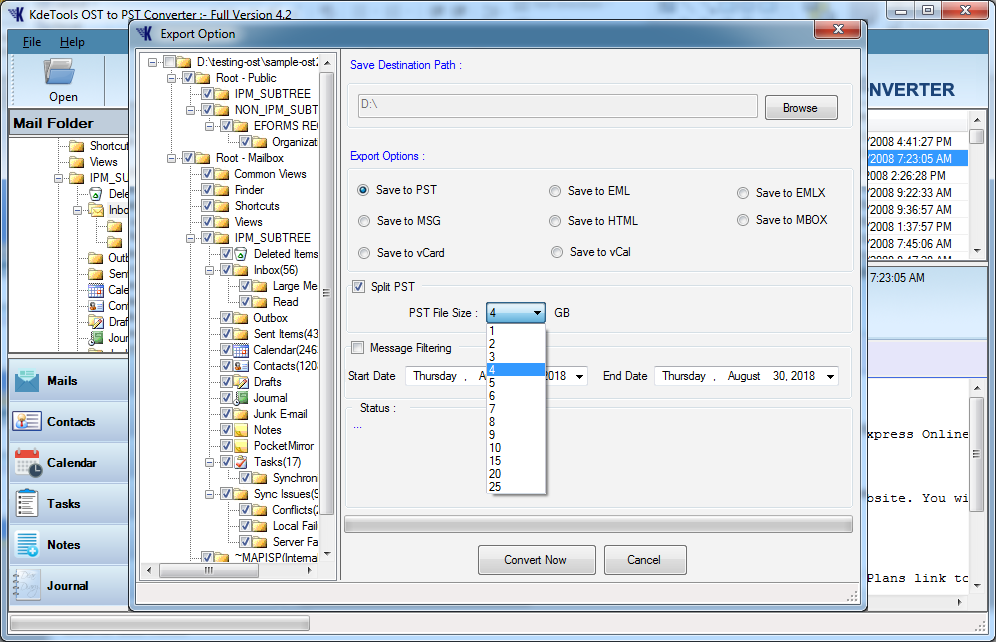
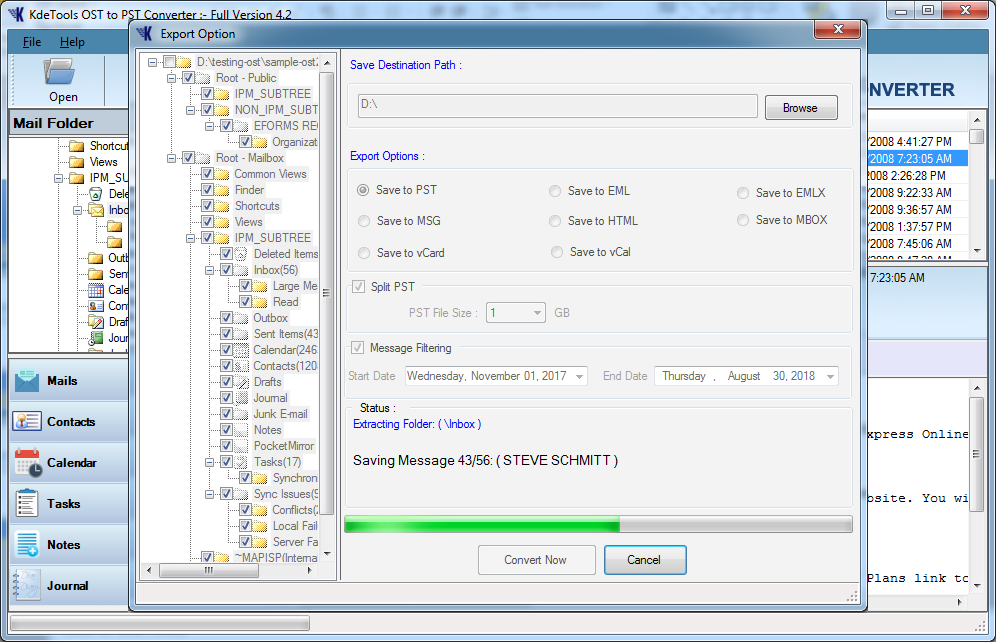
Step 5: In this step, the "Message Filtering" option will appear to split the OST file by specific date range.

Step 6: After this step, click on the "Convert Now" option for the OST to PST Conversion process.
*In a very short period of time, you will get a confirmation message. For the successfully import converted file in any version of Microsoft Outlook.
Step 7: For Office 365: Press on the "Office 365" button from the upper Navigation option. By default 'Office 365' is selected.

Step 8: Open the Office 365 credentials and tick on the "Connect to Server" button.
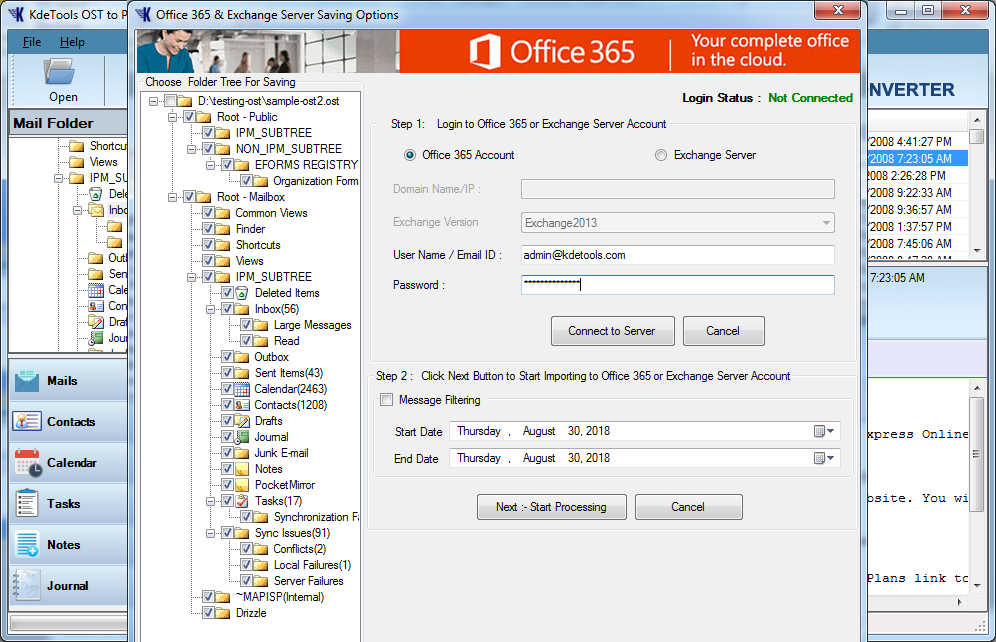
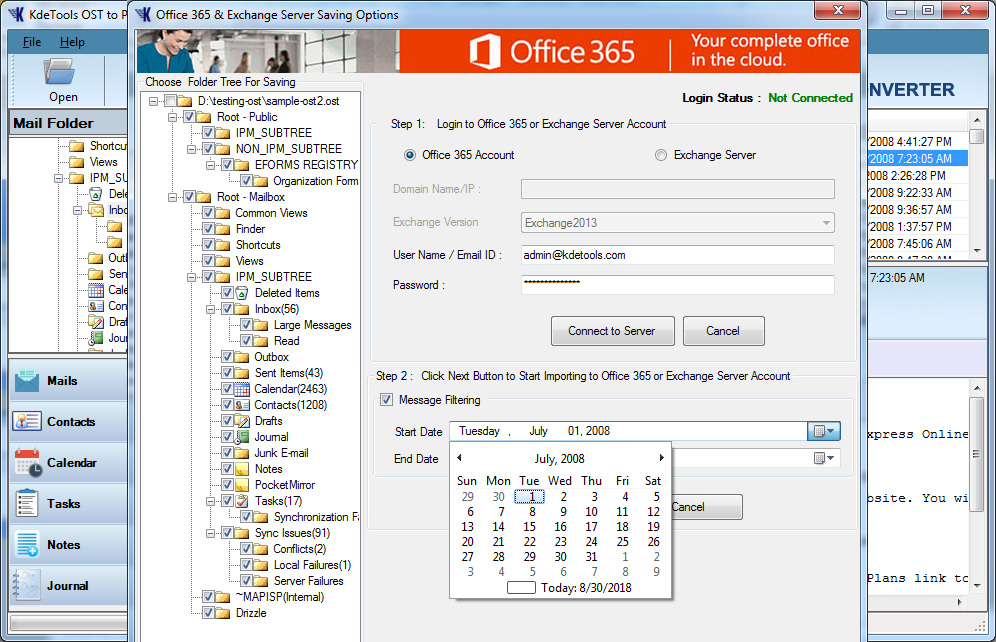
Step 9: In this option, You can also filter message by specific date range.
Step 10: Then Press on the "Start Processing" option to transfer OST data into the Office 365 account.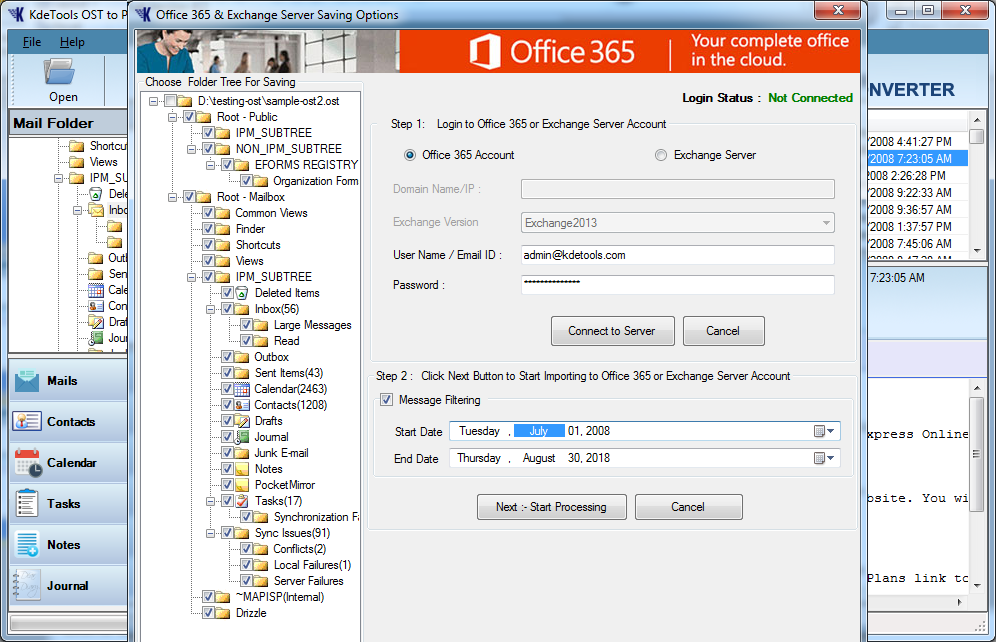
Step 11: For Exchange Server:From upper navigation press on Office 365 button. Select radio button named "Exchange Server" and open Exchange Server credentials.

Step 12: Now, You can also filter message by specific date range.
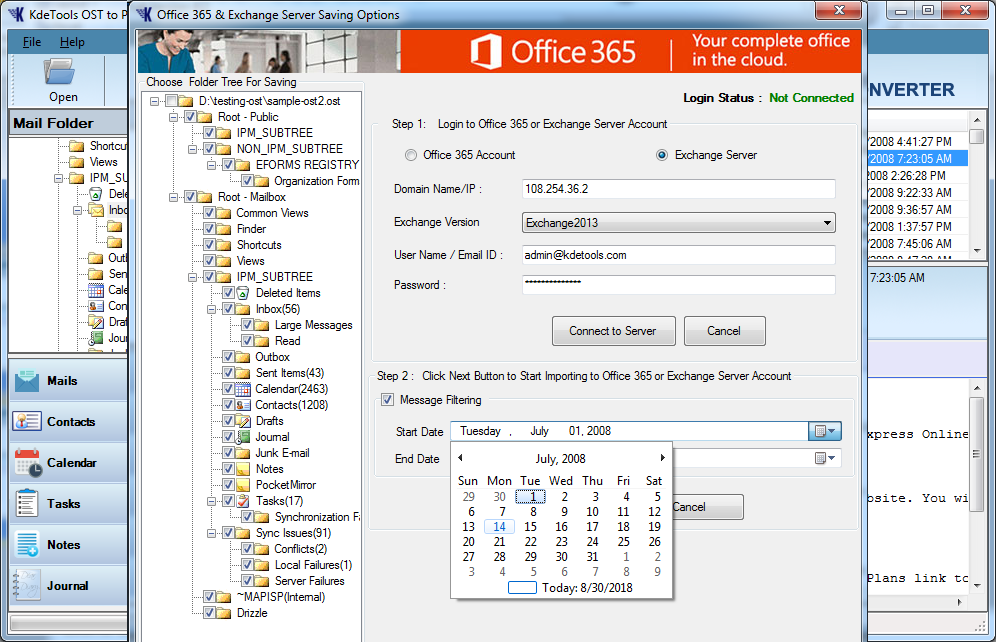
Step 13: In the end, select "Start Processing" option to import OST file contents into Live Exchange Server account.
REACH US
18 Ely Place, 2nd Floor,
New York, NY - 10006,
United States
![]() +1-18002661001
+1-18002661001
![]() +91-9555514144
+91-9555514144
PRODUCT LINKS
OLM to PST Converter
NSF to PST Converter
PST to MBOX Converter
Outlook PST Splitter
Outlook PST Merger
MBOX to PST Converter
Thunderbird to Outlook
EML to PST Converter
SUBSCRIBE
Get Latest News & Updates